
Waking up in a cold puddle ruins any campout instantly. A soggy sleeping bag turns a dream trip into pure misery. You need a reliable waterproof camping tent before packing your vehicle. Dirt, friction, and sunlight wear down your gear over time. Regular fabric care keeps your shelter standing strong against wind and rain. Pitching your gear in the yard reveals hidden wear right away. You can easily fix these issues using simple, affordable techniques at home.
Understanding Fabric Wear and the Need for a Waterproof Camping Tent
Modern shelters use woven nylon or polyester coated with protective layers. These thin barriers keep moisture out while keeping total pack weight low. Trail grit, sunlight, and sharp folds slowly grind down these surfaces. Water starts soaking straight into the threads instead of beading up. When heading out to capture stunning astrophotography desert night skies, sudden temperature drops can test thin fabrics just as intensely as storms. Maintaining a waterproof camping tent takes real effort, not wishful thinking. Small pinholes and flaking tape quickly lead to soggy base layers. Caring for synthetic fabrics keeps you warm, safe, and comfortable. Reliable tent waterproofing protects your gear investment for many years ahead.
Why Factory Coatings Degrade Over Time
Outdoor gear takes a beating on rough, stony campsites. Strong sunlight breaks down molecular bonds inside polyurethane layers over time. Fine dust particles grind into tiny fabric pores like rough sandpaper. Trapped moisture quickly breeds mildew if you store gear away damp. Noticing this breakdown early saves you from sudden disasters outdoors. A sticky interior floor signals that your coating is already failing. Quick maintenance rescues your shelter before wet trail conditions ruin everything.
Signs Your Shelter Needs Immediate Attention
Inspect your gear on a sunny lawn before packing your backpack. Look for peeling tape, cloudy coatings, and bad chemical smells. These warning signs tell you that your shelter needs work immediately. Loose, curling tape along interior ceiling and floor lines indicates coating failure. Sticky, tacky feelings on coated interior base fabrics mean moisture layers are breaking down. Rain soaking into the outer shell instead of sliding off shows lost repellency. Stretched seams near corner guyout loops and anchor points require prompt resealing.
Proper fabric care keeps gear running smoothly for years, while total neglect ruins waterproof layers fast.
5 Essential Steps: How to Waterproof a Camping Tent Before a Trip
Learning how to waterproof a camping tent before a trip gives real peace of mind. Just like avoiding common cycling mistakes that slow you down on a bikepacking tour, proper gear preparation saves enormous energy in the wild. You do not need expensive machines or complex laboratory skills here. A clean yard, basic tools, and outdoor sealants get the job done. Building a dependable waterproof camping tent takes patience and steady attention. Rushing through the work traps grit beneath sealants, causing early failure. Follow these five clear steps carefully for lasting, dependable trail performance.
Step 1: Deep Cleaning and Thorough Fabric Inspection
Never spray outdoor sealants on dirty, dusty, or greasy gear. Ground grime blocks liquid sealants from bonding to synthetic fabrics directly. Wash your shelter with cool tap water and mild technical soap. Skip standard household laundry detergents, bleach, and home washing machines. Aggressive machine agitators tear light mesh, while detergents strip factory coatings. Sponge down dirty spots gently, then rinse everything with a clean hose.
Step 2: Pitching, Drying, and Surface Preparation
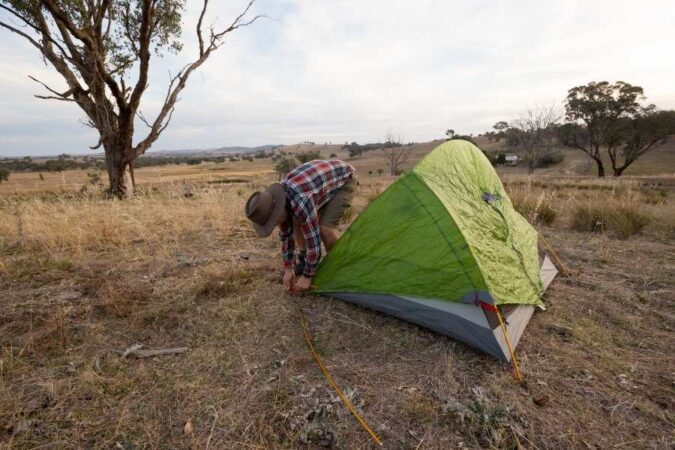
Pitch the shelter fully in a dry, shady backyard spot. Keeping the panels taut exposes seams and speeds up drying time. Avoid harsh midday sun, which cures liquid sealants much too quickly. Make sure every single panel dries completely before opening any bottles. Moisture trapped under fresh coatings causes bubbles and ruins chemical bonds. Check your zippers, guylines, and shock cords while the fabric dries.
Step 3: Resealing Seams and High-Stress Points
Stitched seams leak first because needles punch thousands of tiny holes. Factory seam tape lifts over time, letting moisture creep inside quietly. Knowing how to apply seam sealer to a camping tent stops heavy downpours. Peel away brittle, flaking tape using your fingers or rubbing alcohol. Paint a smooth, thin layer of liquid seam sealer along seams. Cover corner points, floor edges, and outer guyline loops carefully. Let this fresh coating cure undisturbed for twelve hours to dry.
Step 4: Applying Durable Exterior Water Repellent
Turn your attention to the exterior shell once seams dry completely. Your outer rainfly takes the hardest beating during sudden, stormy squalls. Spraying a dedicated waterproof spray restores water beading on worn fabric. Leave the fly pitched taut over poles or hang it up. Hold the sprayer eight inches away, coating panels evenly and smoothly. Wipe away heavy liquid drips using a clean, damp cloth immediately. This vital layer provides dependable rain protection so runoff rolls away easily.
Step 5: Waterproofing the Bathtub Floor and Interior Ground Contact
Ground moisture pushes hard against tent floors when campers sleep inside. Body weight forces dampness straight through worn nylon or polyester surfaces. Sealing your floor stops moisture from soaking through cold, muddy ground. Spread a thin polyurethane sealant evenly across clean interior floor fabric. Pay close attention to corners where heavy gear sits all night. Let the entire shelter air out fully before packing it away.
Optimizing Camp Setup for Bad Weather Camping
A well-treated waterproof camping tent still requires smart campsite selection outdoors. Setting up inside natural low spots invites water straight toward you. Strong technical fabrics leak if you camp directly inside a puddle. Mastering bad weather camping requires patience, good judgment, and smart pitching skills. Experienced outdoor leaders study local land contours before unrolling their gear. Small setup adjustments divert runoff away, keeping your shelter warm and dry.
Choosing the Right Pitch Location
Avoid camping in low gullies, dry creek beds, or hollows. Pick slightly raised ground with gentle slopes and good soil drainage. Stay away from brittle dead tree branches that snap in wind. Check ground slopes to predict where heavy rain will run off. Placing sleeping quarters on firm, elevated ground prevents water pooling underneath. A quick site inspection saves your entire camp from midnight flooding.
Pitching with Maximum Tension
Loose, sagging fabric invites real trouble when rain starts coming down. Wet nylon stretches, pools water, and lets moisture push through easily. Stake out every guyline securely using tight knots and durable stakes. A tight pitch keeps outer fly fabric away from inner walls. Water wicks straight inside if these two fabric layers touch together. Strong tension sheds wind gusts and heavy rain like a shield.
Mastering the Art of Ventilation
Campers often mistake indoor condensation for an external fabric leak outdoors. You breathe out nearly half a liter of water vapor overnight. Without steady airflow, that moist breath condenses against cold walls quickly. Keep your upper vents cracked open, even during cold, windy nights. Constant airflow moves humid air outside before it drips on you. Good ventilation is the secret to waking up inside a dry tent.
How to Stay Dry Inside a Tent During a Storm
Tough storms test your camp habits, gear, and mental focus. Good habits keep your sleeping area clean while rain hammers down. Moving wet layers inside carelessly ruins hours of careful gear preparation. Knowing how to stay dry inside a tent during a storm saves trips. Simple camp rules keep water out of your main living space. Follow the best steps to protect your tent from heavy rain outdoors.
Managing Wet Gear at the Vestibule
Treat your vestibule like an airlock between nature and your bed. Never bring soaked rain jackets, muddy boots, or packs inside. Leave dripping items under the fly, tucked inside durable dry bags. Keep a small towel near the door to wipe off hands. Smart gear handling prevents water from reaching your dry sleeping bag. Keeping interior fabric clean guarantees warm, restful sleep during long rainstorms.
Reinforcing Anchors and Guylines
Heavy rain softens dirt, pulling lightweight ground stakes loose under gusts. Step outside occasionally to check line tension, pegs, and runoff paths. Weigh loose stakes down with heavy river rocks for extra security. Keep your body and sleeping bag clear of wet tent walls. Touching damp fabric breaks surface tension, pulling moisture straight inside your room. Respecting small living boundaries keeps your sleeping gear dry and safe.
Emergency In-Field Fixes
A small repair kit prevents torn fabric from ruining your weekend. Pack strong repair tape, adhesive sealant, and silicone patches in your kit. These light supplies fix sudden tears and broken parts right on site. If fly fabric tears, clean the rip, dry it, and apply tape smoothly. If a seam line leaks, dab liquid sealant directly over the seep point. And if the floor is punctured, press a round patch firmly over the hole. If a pole breaks, slide an aluminum repair sleeve over the break and tape it securely.
The Long-Term Benefits of Routine Weatherproofing
Seasonal gear maintenance pays off across years of wild outdoor travel. Caring for your shelter builds defense against rain, sunlight, and friction. Fixing your gear saves money and keeps old tents out of landfills. Regular weatherproofing turns standard gear into tough shelters that handle nasty weather. Caring for equipment builds confidence and deepens your outdoor connection. You step onto wet trails knowing your shelter will protect you.
Frequently Asked Questions (FAQ)
How often should I waterproof my camping tent?
Inspect and seal your shelter once every season or before any long trip. Reapply coatings right away if water stops beading on exterior fly panels.
Can I use ordinary silicone spray on any camping tent?
No, you must match the sealant type to your specific fabric coating. Polyurethane fabrics need polyurethane sealants, while silnylon requires silicone formulas to bond properly.
Why does my tent leak even after applying a new waterproof spray?
Leaks happen because water seeps through unsealed needle holes along seams. Trapped breath condensation also drips down walls, mimicking real fabric leaks.